
Tutorial | Projects Module
In this tutorial, we’ll take a look at the Projects module — your command center for tracking Google Shopping Ads performance across different markets and product categories. We’ll walk through how to configure projects, structure your search terms, and set up tracking that delivers clean, reliable, and actionable market insights.
Dashboard Overview

Projects — how many projects you’ve created versus your plan limit;
Countries, Locations, and Searches — the overall scope of your tracking setup;
Active vs paused searches — only active searches consume your plan capacity;
The Projected Cost chart shows how many searches are scheduled per day throughout the week. This makes it easy to understand how much of your monthly plan capacity you’re using and where your usage is concentrated. Your Balance shows the remaining search credits and available capacity. Below, you’ll see a list of all your projects. Each project can contain up to 10 active search terms, giving you structured control over what you track.
Step 1. Create a new project
To create a new project, click ‘Add Project’. Start by giving the project a descriptive name that clearly reflects the product category or campaign you’re tracking — for example, ‘Running Shoes Campaign’ or ‘Winter Apparel’. Then, select your target country. Each project is locked to a single country. Once the project is created, the country cannot be changed, so choose carefully. When you’re ready, click ‘Create new project’ to proceed.

Proper grouping of search terms
Before we add search terms, let’s talk about strategy. Proper grouping of search terms is essential if you want your reports to reflect the real competitive landscape and accurate market pricing.
First. Group by Product Category. Each project should focus on one specific product group or category. For example, create one project for ‘Running Shoes’ and a separate project for ‘Winter Jackets’.


Avoid mixing unrelated products in the same project — combining different categories leads to diluted insights and makes it harder to interpret competitor behavior, pricing levels, and product visibility for any single category.

A focused project ensures your market reports show only relevant competitors and pricing for that specific product category. Use Only Related Keywords Within a Project. Inside each project, add search terms that tend to trigger similar Shopping Ads results. For instance: ‘running shoes’, ‘buy running shoes’, ‘best running shoes’. These queries all display very similar Shopping results and product sets — which means they belong in the same project. If a keyword starts consistently pulling in different types of products, it’s a good candidate for a separate project.


Track Top-Performing Search Terms

If you’re already running Google Ads campaigns, start by tracking your best-performing search terms — the ones that are responsible for actual revenue or meaningful conversions.
Prioritize keywords with substantial search demand, rather than long-tail, ultra-specific variations with very low volume.
This approach allows you to measure the competitive landscape where it matters most — in the queries that drive the majority of your performance.
This strategic grouping is what gives you clean, segmented, and actionable data in your market reports.
Step 2. Add a search term

Click ‘Add Search’ or the plus icon next to any project to open the configuration form. Here’s what each field does and how to think about it:
(1) Project number — select which project this search belongs to. You’ll see each project’s remaining capacity and the associated country.
(2) Search Term — enter the exact keyword phrase you want to track. Use specific, commercial-intent queries that shoppers are likely to use when they’re ready to buy.
(3) Language and Time Zone — choose the language and time zone that match your target market. This ensures your scheduling aligns with local user behavior.
(4) Engine — select ‘Main Search Tab’ to track rankings in the primary Google Search results, where Shopping Ads are shown.
(5) Device — choose Desktop, Mobile, or both. We always recommend tracking both devices to get a complete and accurate view of your Shopping Ads performance.
(6) Domain — this is automatically set based on your project’s country, so you’re always tracking the correct Google domain.
(7) Frequency — how often rankings are checked. Every 1 hour gives you consistent daily tracking with a lower search cost. Every 30, 15, or 10 minutes provides more granular trend data but consumes more searches.
(8) Schedule and Time. Select the days of the week when tracking should run. Set your time window — the minimum is 6 hours.
A common setup is 6 AM to 11 PM in the target time zone, which covers both business hours and evening shopping behavior.
On the side, watch the Cost Preview as you adjust these settings. It updates in real time and shows exactly how many searches per day this term will use with your current configuration.
IMPORTANT: You must add at least one location before you can save the search.
Step 3. Add locations to target

Click on any state or region on the map. A popup will appear listing all available cities within that area, sorted by population. Each city has a population badge. These badges help you quickly identify your primary markets versus smaller test markets. To target a city, simply click the plus icon next to it. The city is immediately added to your target locations for this search.
Once you’ve selected your locations, the map updates to give you a clear visual overview. Selected states or regions are highlighted. Red dots indicate the specific cities you’ve chosen. On the right side, you’ll see a panel listing all your selected cities along with their population data. When everything looks correct, switch the search status to Active, and click "Add" to save the search into your project.
Projects List

After you’ve added search terms, you can expand any project to view all searches configured within it. For each search term, you have a set of action buttons: Pause or Play to toggle between Active and Paused and manage capacity usage; Edit to adjust any of the settings; Duplicate to quickly create similar searches with minor variations; Delete to remove the search term entirely.
At the project level, you’ll see aggregate information: total daily cost, total number of locations, and how many of the 10 available search slots are currently used in that project.
For deeper analysis at the project level, you can enable the ‘Project dashboard’ in the project settings.

The Project dashboard provides: a map visualization of all states or regions you’re targeting, including counts per region; key metrics such as number of states covered, total number of locations, and the combined targeted population; a search status breakdown, showing how many search terms are currently Active versus Paused; and a Projected Cost chart that shows how your searches are distributed across the week. This view gives you a clear understanding of your geographic coverage, audience reach, and capacity usage patterns for each project.
Best Practices
1. Start Small, Scale Smart.


Begin with a limited number of high-priority locations and your top-performing keywords — ideally the search terms already driving revenue in your campaigns. Once you validate that the data is consistent and valuable, gradually expand to more locations based on your actual sales volumes and strategic markets. A good starting point is to focus on your top 5 sales markets.
2. Optimize Your Tracking Configuration.
Use your reports to identify search terms that aren’t adding value — for example, very low volume queries or terms with noisy results. Pause or remove them, and use the freed searches per day to add more locations to your best-performing keywords, or to test additional strategic keywords in the same product category.

3. Market Expansion Strategy.
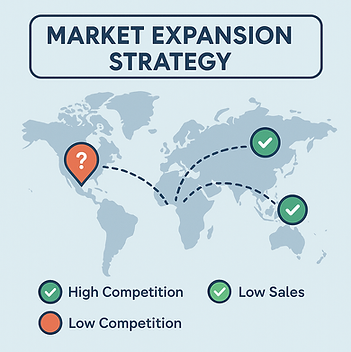
Your reports can highlight markets where competition is high but your sales are low or inconsistent. These markets often represent untapped opportunities. Add or refine tracking for these locations to understand competitor presence, pricing, and product mix before deciding how to adjust your Shopping campaigns.
Summary
You’re now ready to set up structured, reliable tracking for your Google Shopping Ads using the Projects module. Remember to group search terms by product category; use related, commercially relevant keywords within each project; start with your best-performing, high-value search terms; and monitor your capacity and coverage regularly. Your projects and reports will give you the competitive insights you need to optimize your Shopping campaigns and make informed decisions about markets, budgets, and strategy. For more detailed workflows and advanced optimization techniques, explore our additional tutorial videos.


